

The difference between ChatGPT subscription and OpenAI Credits:
ChatGPT Subscription:
-
- Purpose: The ChatGPT subscription is intended for personal use within the ChatGPT application, providing enhanced user experiences such as access to the latest models, quicker response times, and priority during high-traffic periods.
-
- Usage: This subscription is tailored for individuals who interact directly with ChatGPT via the OpenAI website or mobile app.
-
- Payment: It typically involves a recurring monthly fee (e.g., ChatGPT Plus), which grants users these premium features on a subscription basis.
OpenAI API Credits:
-
- Purpose: OpenAI API credits are designed for developers and businesses that integrate OpenAI’s language models into their own applications, services, or products. These credits are used for making API calls to utilize OpenAI’s capabilities.
-
- Usage: Credits are used on a pay-as-you-go basis, with costs determined by the number and complexity of the API requests made. This model is suited for scalable, programmatic access to OpenAI’s tools.
-
- Payment: Users purchase credits in various amounts as needed. There is no fixed monthly subscription; instead, credits are bought and deducted based on API usage, offering flexibility and control over spending.
1. Log In to OpenAI Platform
-
- Open your web browser and go to OpenAI Platform.
-
- Enter your OpenAI account credentials (email and password).
-
- Click on the “Log In” button.
You need to access your OpenAI account to manage your billing and credits. The platform.openai.com is the main interface for developers using OpenAI’s services.
2. Navigate to Billing
Go to the settings located at the top-right corner

You should then see the “Billing” from the inner sidebar, click it to view the billing settings. Billing overview – OpenAI API
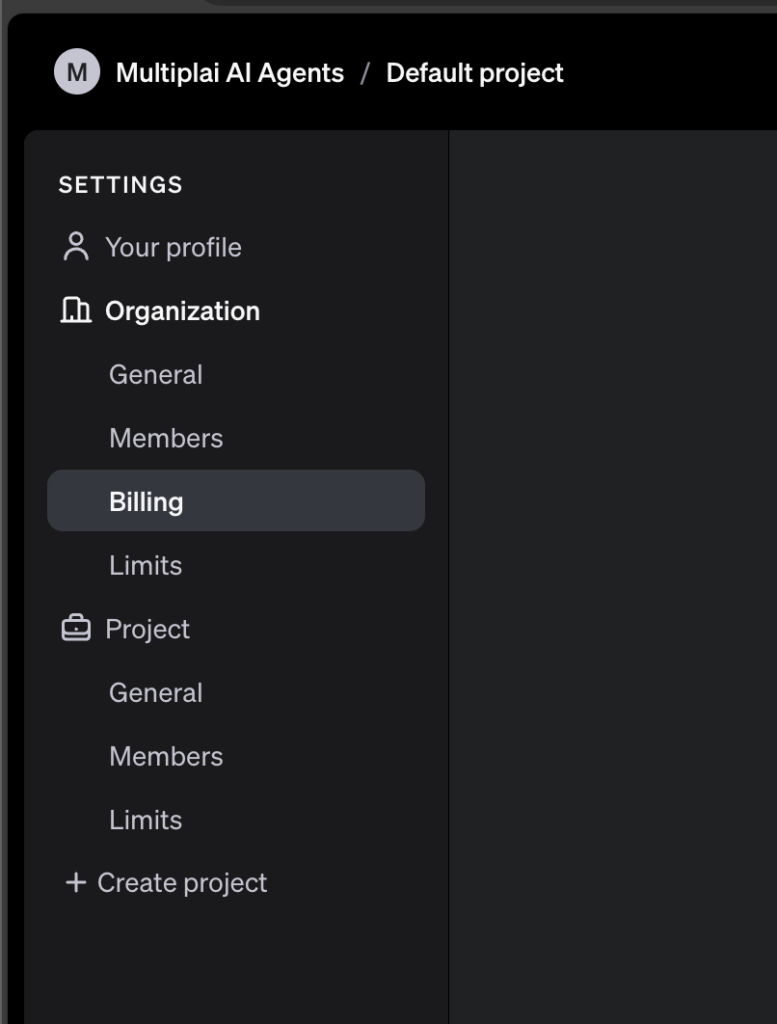
The Billing section contains all the information related to your account’s financial transactions, including your current credit balance, usage details, and payment methods.
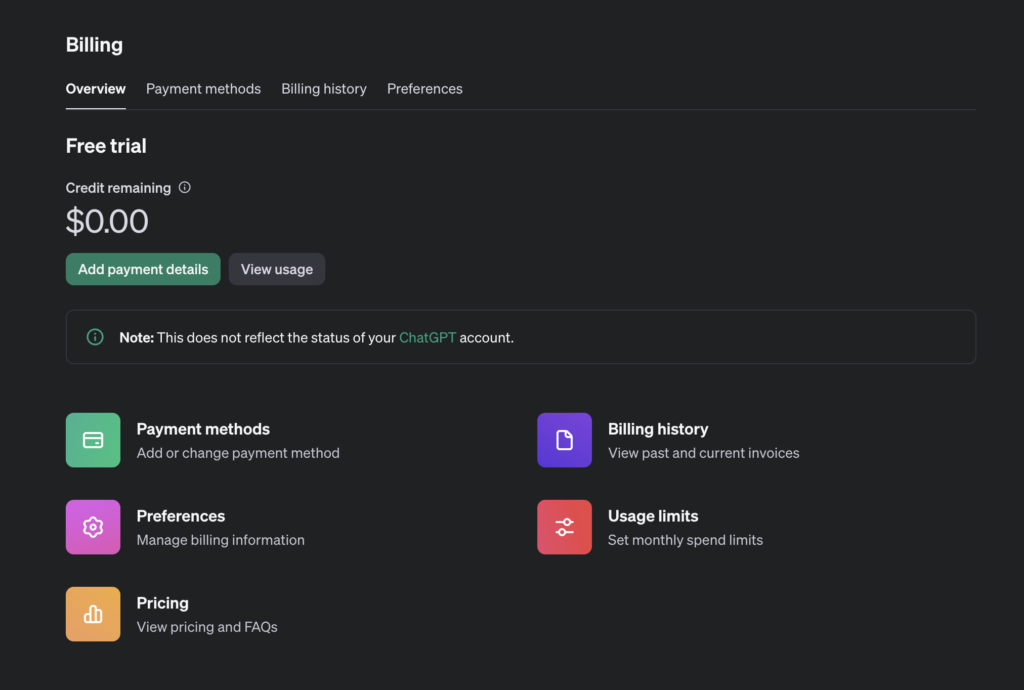
3. Adding payment details
Once you’re on the billing page, you’ll se the “Add payment details” button.
You can choose between “Individual” for personal purpose or you’re not planning to use it in your business. Or you can choose the “Company” option if you’re working on behalf of a company.
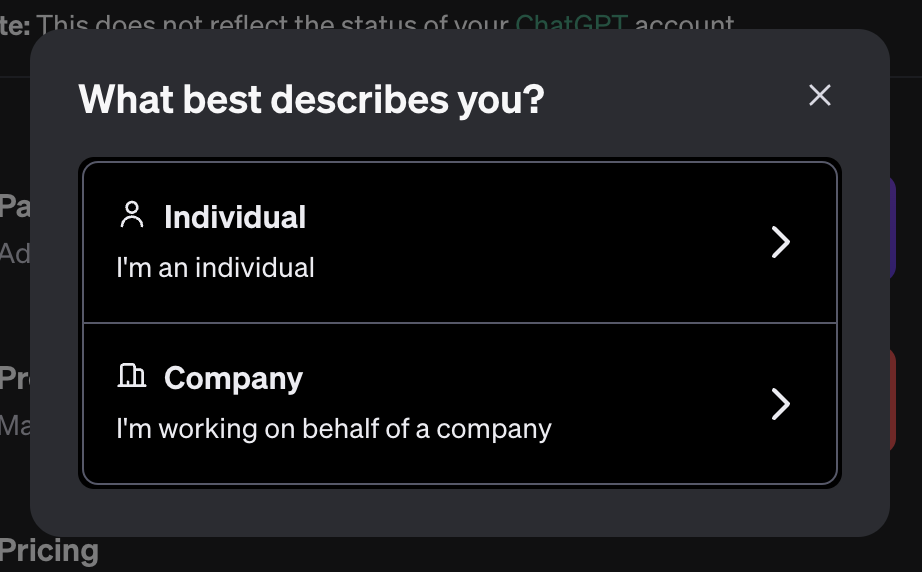
Once you have selected any of the options, you should see a dialog where you will need to provide your card details, just complete the form to add the payment details.
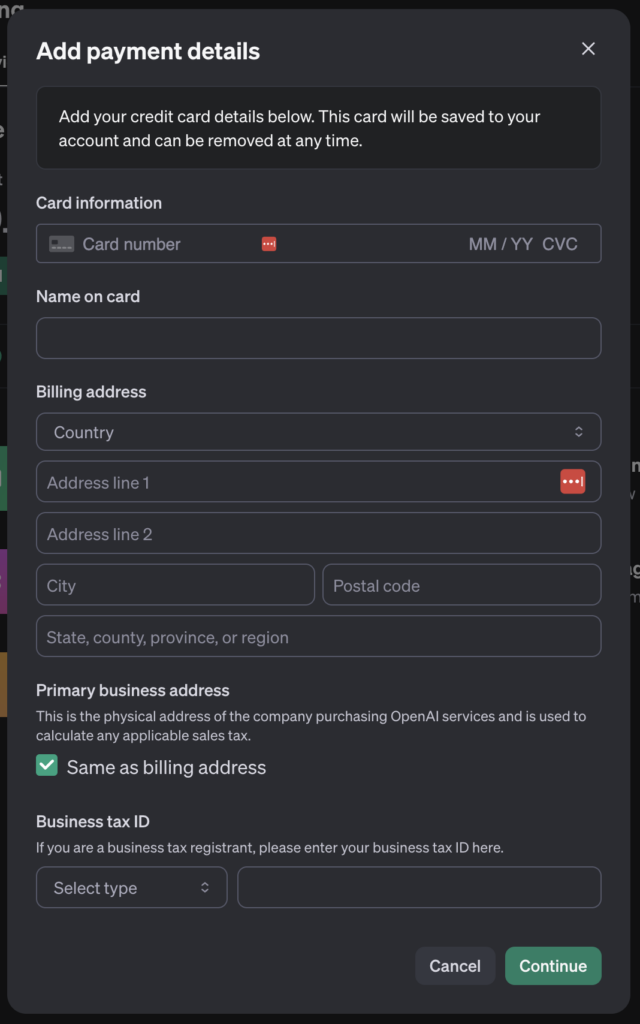
OpenAI requires a payment method to process transactions. Adding a payment method ensures that you can seamlessly purchase credits and maintain your API usage without disruptions.
4. Adding more Credits
After successful adding of payment details, you should now see the “Add to credit balance” button.
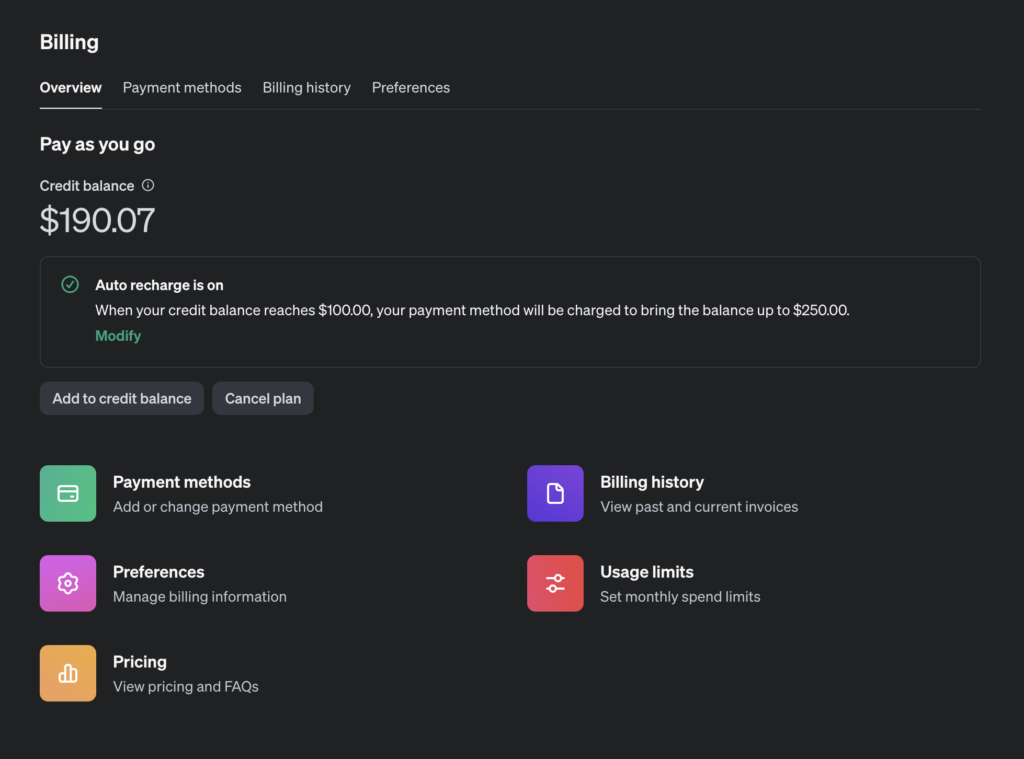
After clicking the button, a dialog should appear asking for how much you would like to add.

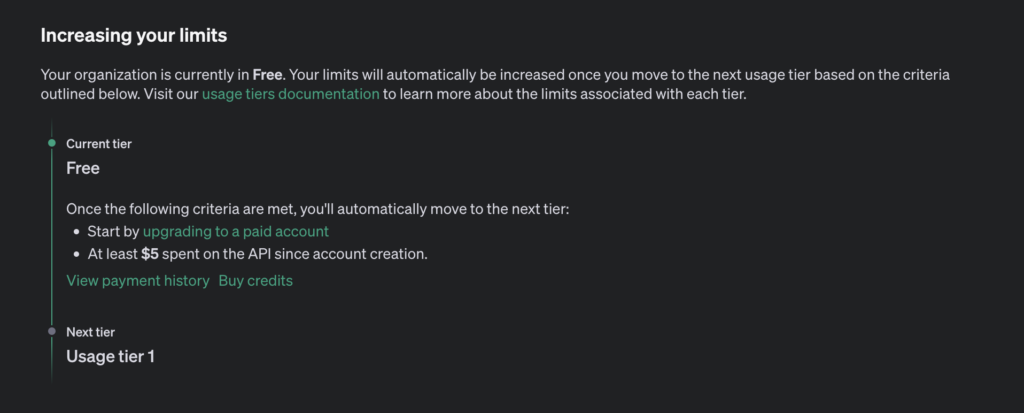
We recommend for you to add at least $5 worth of Credits, for you to move to the next tier, and be able to use more advanced language models.
Topping up credits allows you to continue using OpenAI’s API services. Credits are deducted based on your usage, so having an adequate balance is crucial for uninterrupted access.
5. Confirm Purchase
-
- After completing the payment, you should receive a confirmation email from OpenAI.
-
- Check your email inbox for this confirmation.
-
- Return to the Billing section on the OpenAI platform to verify that the new credits have been added to your account.
How to set usage limit and threshold
First, you must go to the “Limits” page, by clicking it from the menu. Limits – OpenAI API
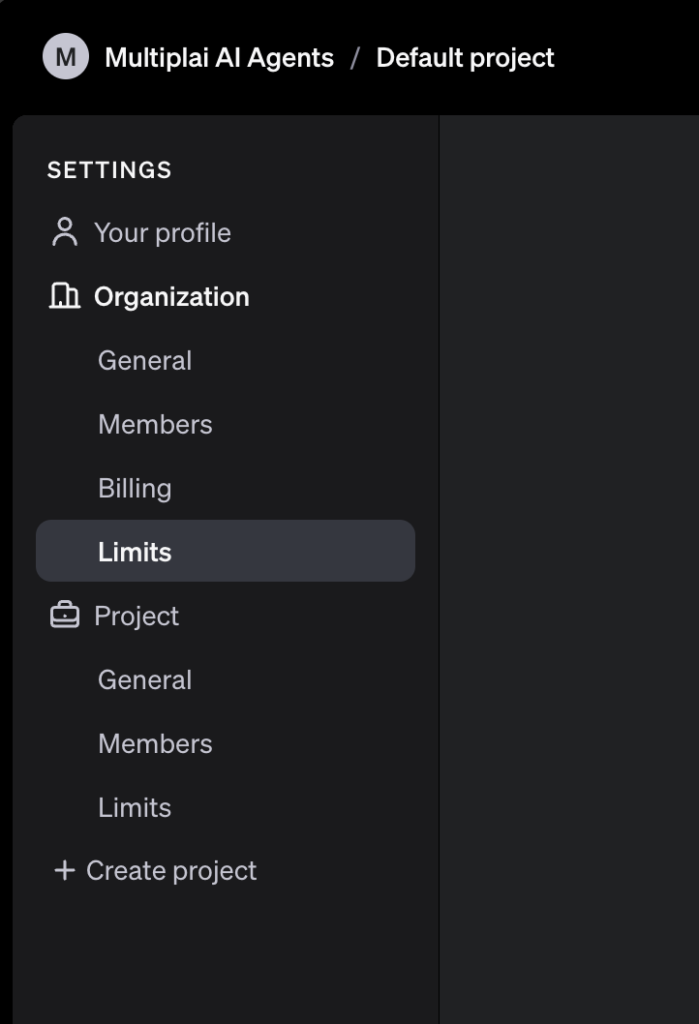
Then you should be able to see this section, where you can set a monthly budget, and an amount when you want OpenAI to notify you when reaching to a certain amount of usage.
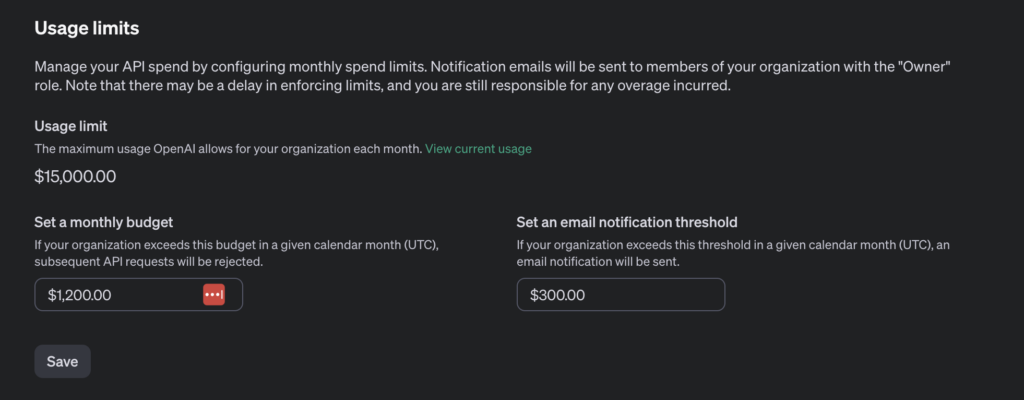
This is to ensure you have control on your usage and maximum budget that you have.
Visit our website 👉 https://rea.pro
File a feature request or bug report 👉 https://multiplaitech.canny.io/
Call for support 👉 https://rea.pro/support-meeting